The Admin Interface
You use the Admin Interface to create, edit, launch and monitor natural language interfaces (NLIs). The Admin Interface consists of several pages, each accessible from the navbar at the top (see top of figure 1). On the navbar, from left to right, NLIs is where you launch natural language interfaces, Create is where you create new configurations and Edit is where you refine and extend existing configurations. On the far right of the navbar, there is a memory usage meter, a link to documentation and the Catch-Phrase logo which, if hovered over, shows the current version of Catch-Phrase. Finally, there is a logout button.
The NLIs page
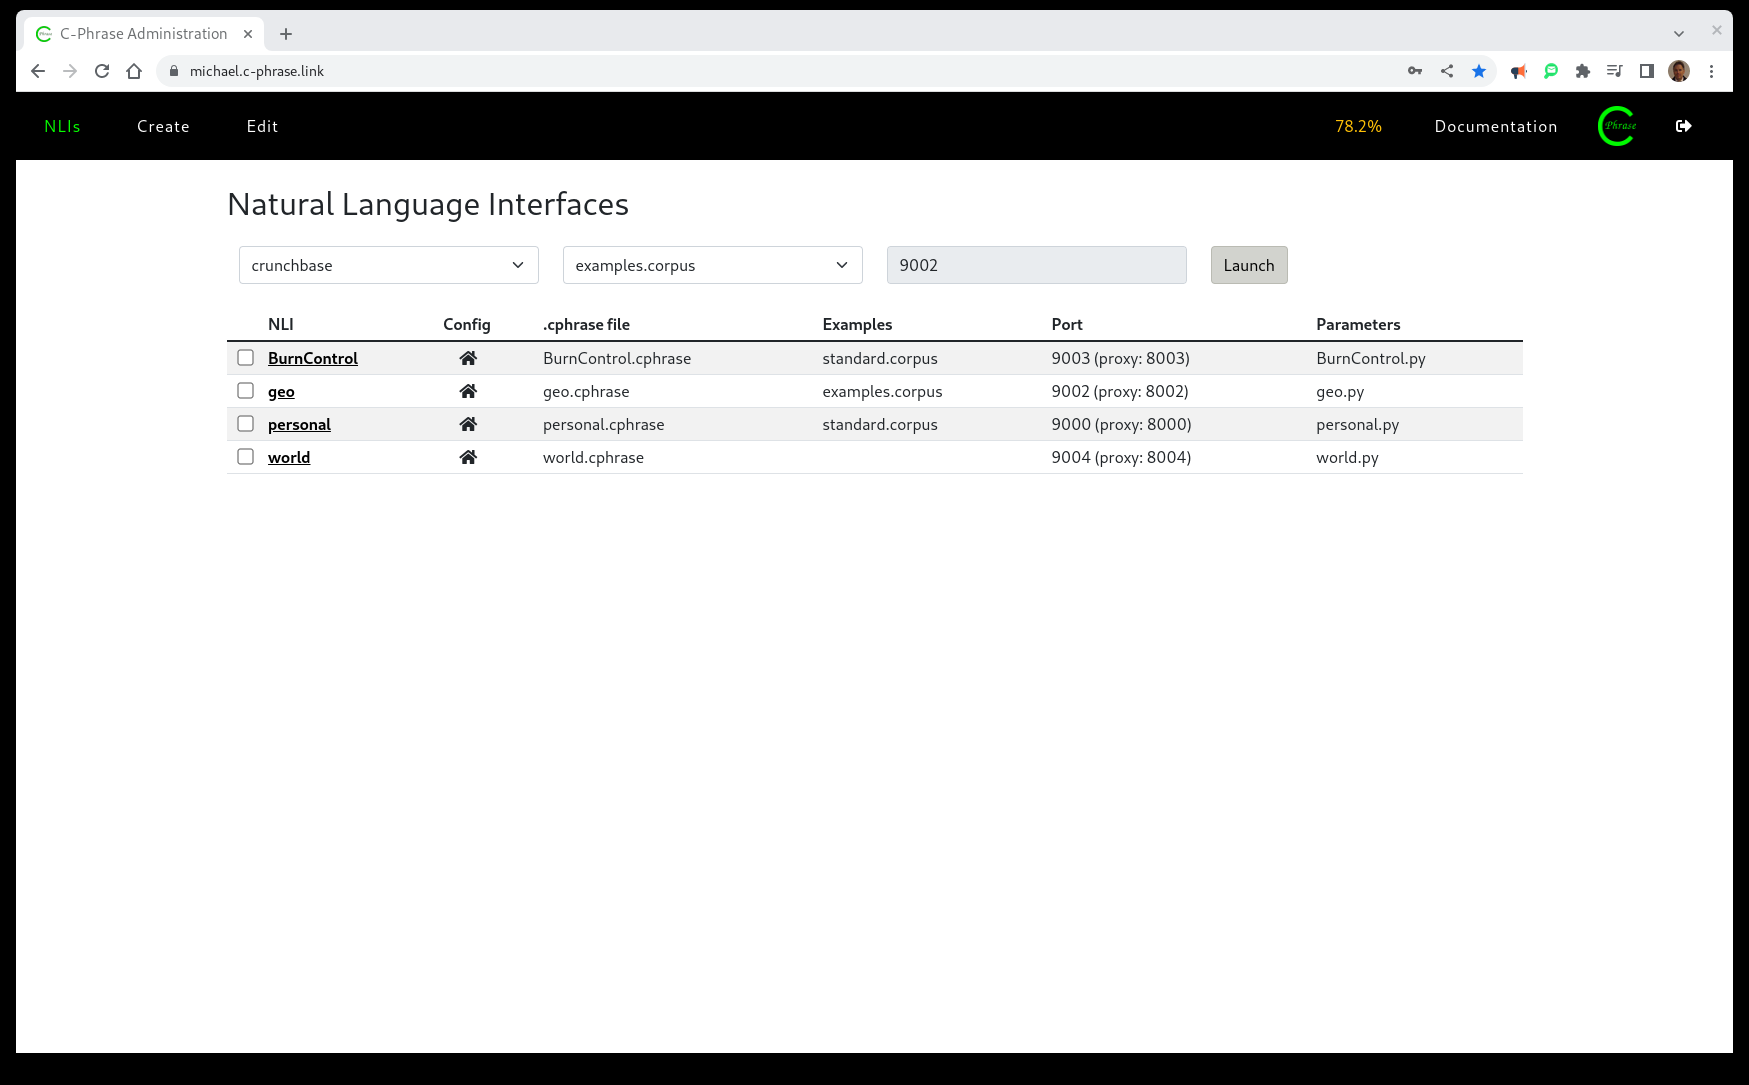
The NLIs page lets you launch natural language interfaces (NLIs) and shows those currently running.
To launch an NLI, select
configuration/corpus/port combinations and click 'Launch'.
In figure 1, the administrator has already launched seven NLIs using seven different
configurations. These NLIs can be accessed through the browser via the given NLI link on the left
of each row. The home button will take you to the home of each configuration under the Edit page.
The .cphrase file, .corpus, port and parameters
buttons will take you to the corresponding files for the given configuration under the Edit page.
The checkbox on the far left lets
you terminate or restart an NLI. Note that each of these NLIs is offering,
unless expressly turned off, a REST interface and an MCP Server interface.
The Create page
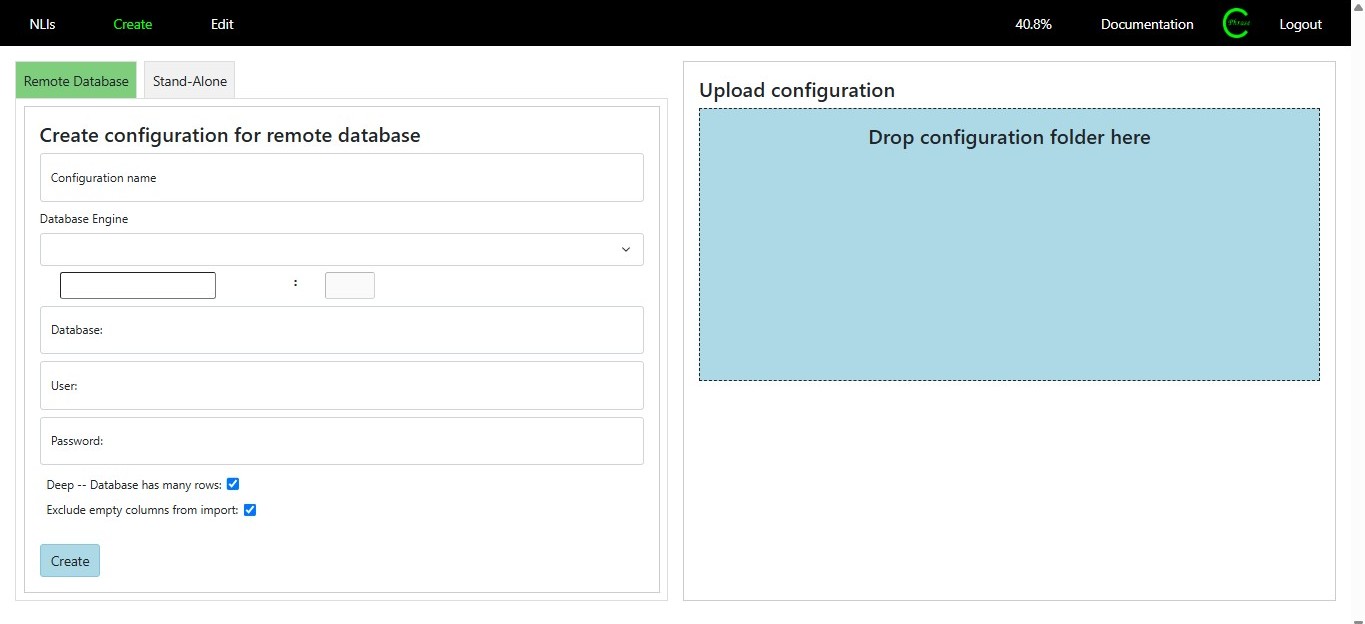
Figure 2 shows the Create page where you can create configurations for remote databases or upload new configurations. In the left half of the page you can create a configuration for a remote database by specifying the configuration name, database engine, remote database host location and port, the name of the remote database and username and password to connect to the given database. Also, you specify checkboxes to indicate the size of the remote database and whether to exclude empty columns on import.
In the right portion of the Create Page, you can upload earlier or backed-up Catch-Phrase configurations. You will need to do this when you upgrade to newer versions of Catch-Phrase. See migration for more details.
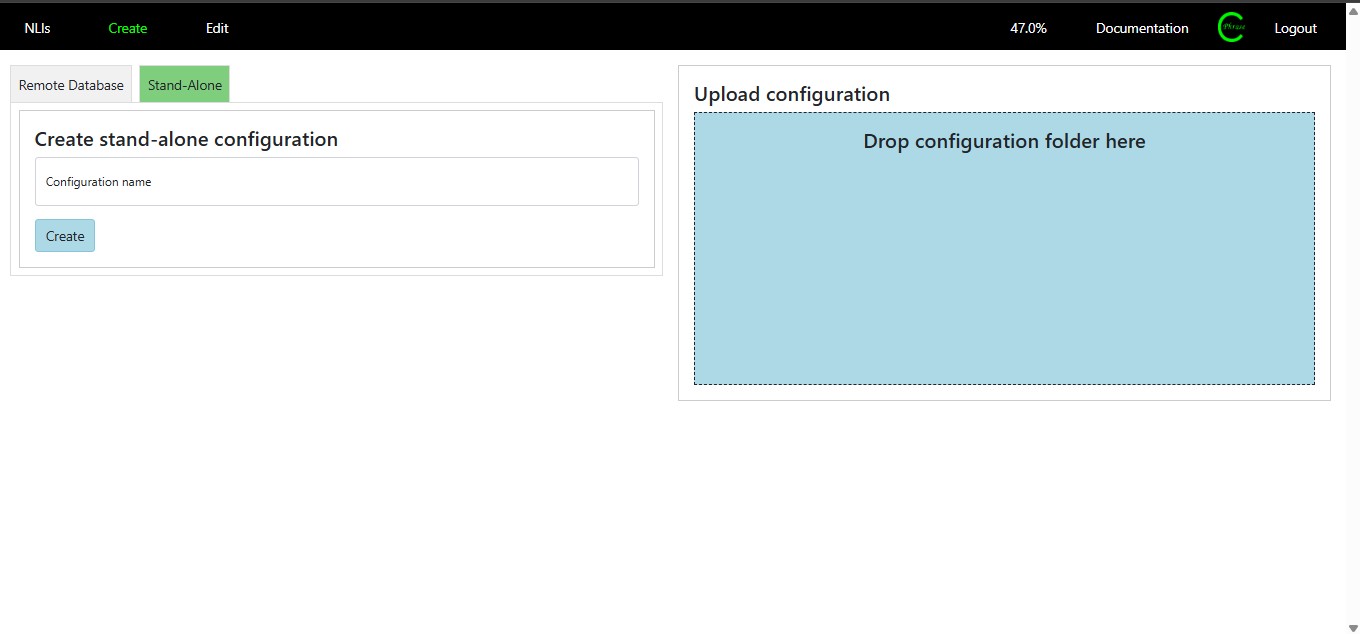
Figure 3 shows the Create page where you can create a stand-alone database. In this case all you need to specify is the name of the configuration. In stand-alone mode, you will build up and evolve your own local SQLite3 database using the Catch-Phrase admin editor tools.
The Edit page
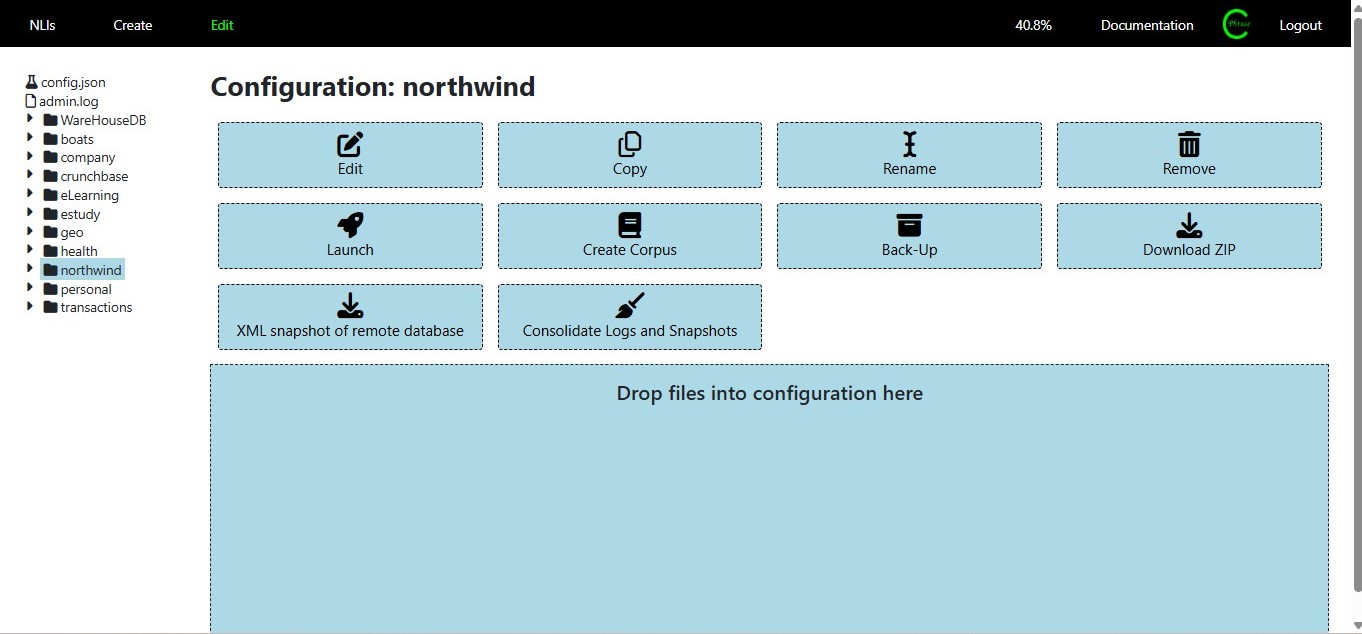
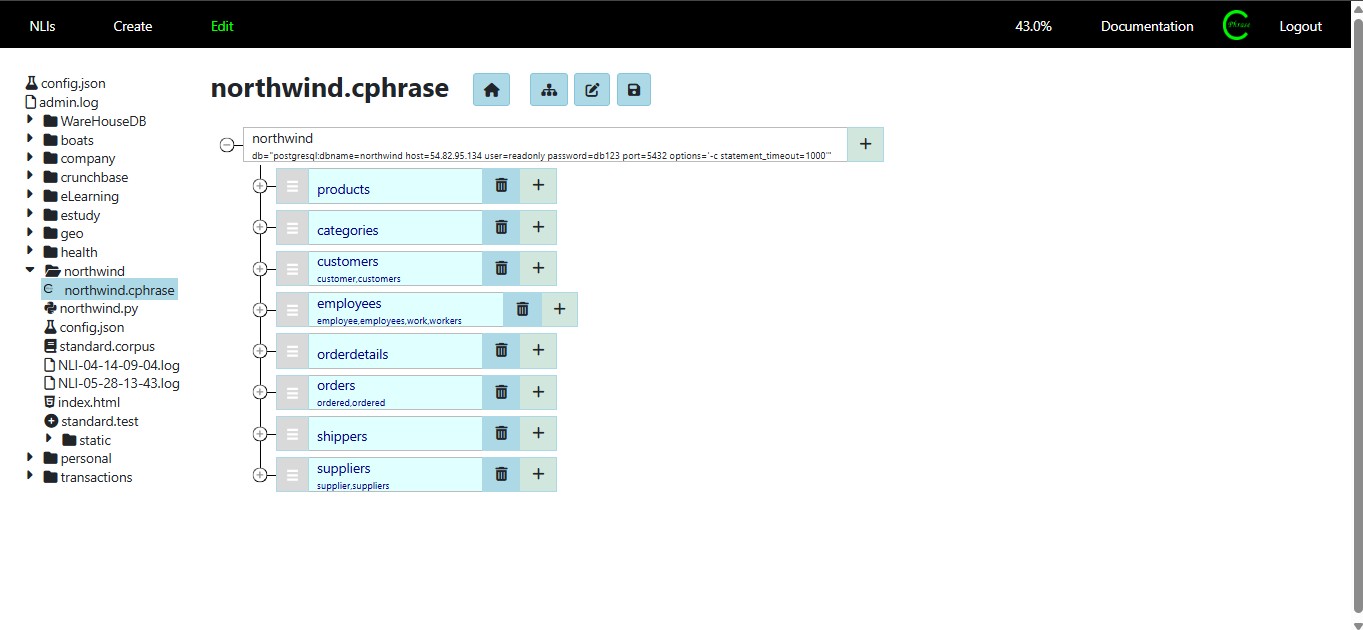
Figure 4 shows the Edit page where you do the bulk of your configuration work. On the left is the file tree
where you select configuration folders or individual files. In the screen above, the
northwind configuration has been selected and we are in its home where a set of ten action buttons
are currently available for selection. By clicking the action button Edit,
you can open the tree editor for the .cphrase file for northwind (see figure 5). The
Copy,Rename and Remove actions apply to the entire directory of the current configuration.
Launch takes you to the NLIs page with the current configuration selected. Create Corpus
lets you build up a set of example natural language questions to present to users. Back-up will copy the configuration to
a hidden directory on the host. You may manually ssh into the host to manually recover such configurations. They are represented in
.back-up directories in the main config directory. It is
recommended to manually back-up prior to major schema evolution operations. The Download ZIP action downloads a .zip file containing the
entire configuration directory. This operation lets administrators back-up their configurations to external file systems
as well as to migrate configurations to newer versions of Catch-Phrase. Clicking on
XML snapshot of remote database will build
.db_xml files that capture the state of the remote database. This operation is dangerous for
very large databases because it literally will copy the entire contents of the database into the
.db_xml files on the host. (For stand-alone configurations this operation is called XML snapshot of local database).
Finally, if you click Condolidate Logs and Snapshots then all the NLI logs will be collapsed into a single log file and all
snapshot files and other logs will be deleted.
In stand-alone mode when there are XML snapshot files present and there is no local database present (it was removed), then you will have the available action Build SQLite Database from XML Snapshot. This allows you to rebuild the local database. This is usually part of the process of schema evolution of the original database. See database evolution for more details.
In remote database mode when there are XML snapshot files present and the target attribute is set, there will be an available action Build Target Remote Database from XML Snapshot. This will build the database into the remote database specified in the target attribute. Via this technique Catch-Phrase can be used in data exchange. See data exchange for more details.
Finally, in the zone at the bottom, administrators may upload specific files and subdirectories into the currently selected configuration directory. Normally this will be CSV files that the administrator is ingesting into the database.
Managing .cphrase files
The <configuration-name>.cphrase file is where you specify which tables and views of the
underlying database can be accessed and with what phrases. This topic is covered in detail in
authoring and a detailed description of the
.cphrase file format is presented The XML Format Manual.
Here we give a broad overview of the interface to perform such edits.
In figure 5, the administrator has clicked on the edit action and the .cphrase tree editor is brought up
for the northwind configuration. This is where you build and edit a
.cphrase file.
Once you have updated and saved a configuration, you
must launch or restart an NLI for users to use it.
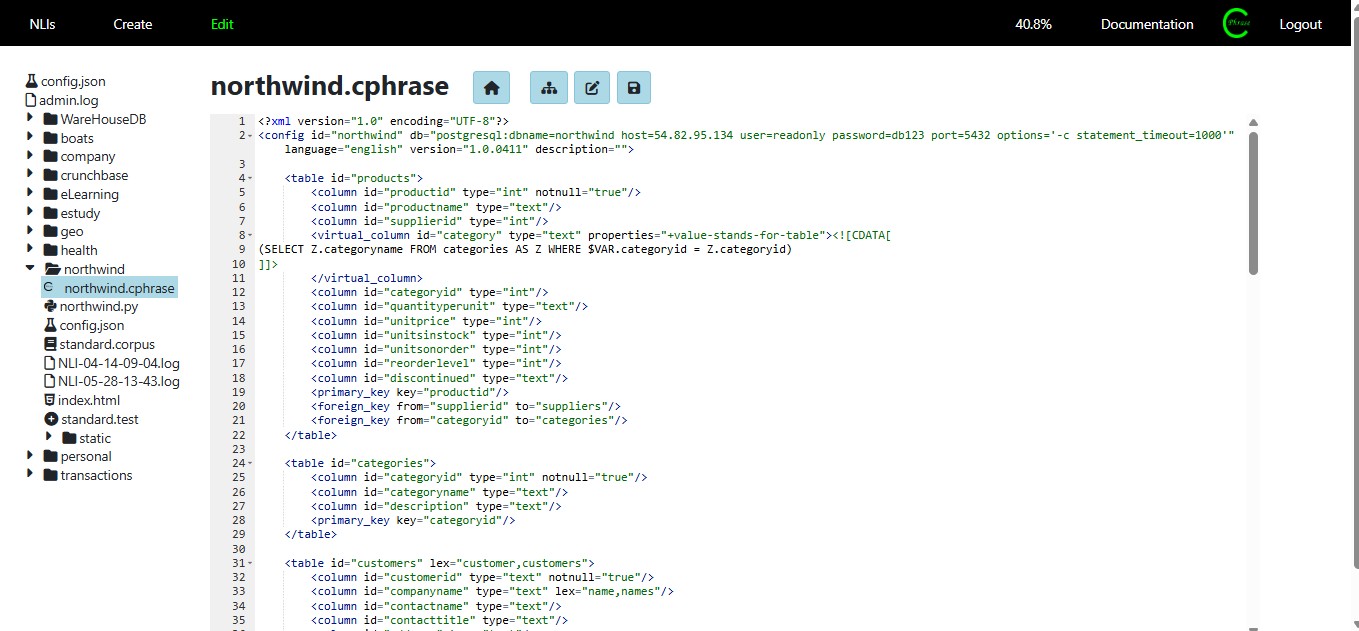
In figure 6, the administrator has clicked on the edit action and selected the edit flat file button. This allows you to directly modify the XML within the editor. Note that if you try to save non-valid XML, the editor will block you.
Managing .corpus files
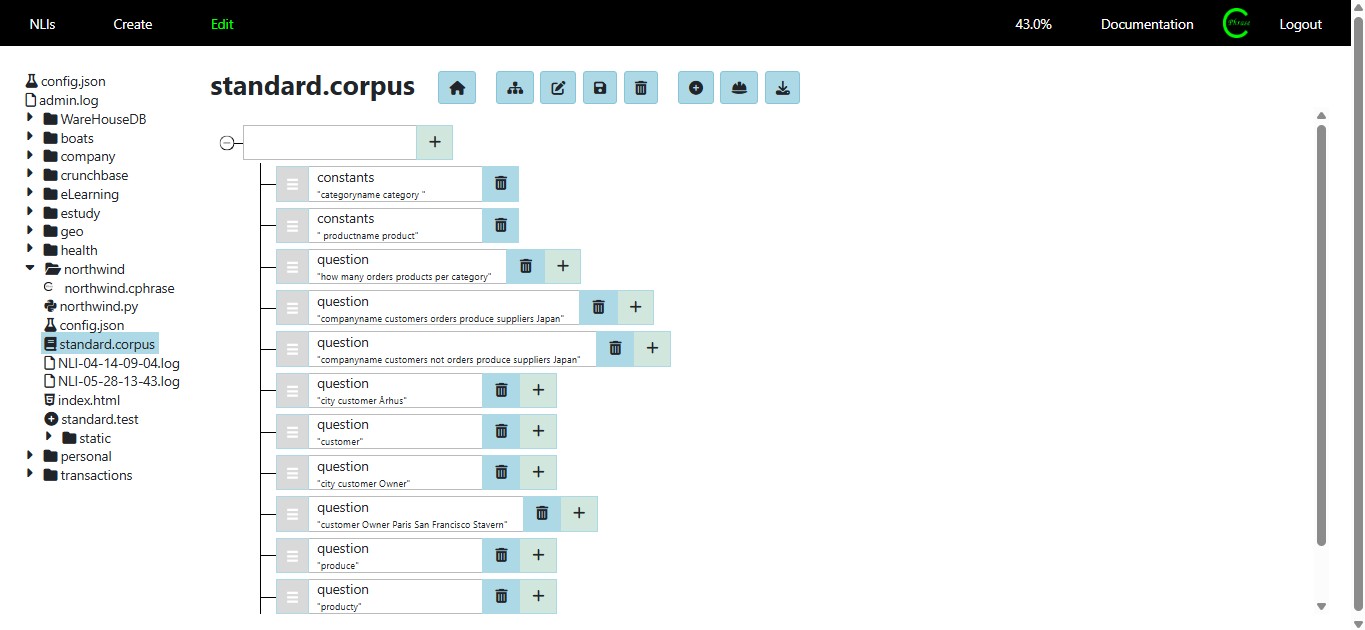
In figure 7 we see the tree editor for corpus files where we specify a set of
pre-build example questions to present to users as examples or as
custom constants that can be used in the explorer of the NLI to help users
click construct questions and commands.This topic is covered in detail in
corpus and a detailed description of the
.corpus format is presented The XML Format Manual.
Managing other files
In the above figure 7 the contents of the northwind configuration directory are displayed in the file
navigator. There are several distinct file types other than the .cphrase and .corpus files
that are relevant:
- The
.logfiles are XML-based logs of user sessions over the NLI. When opened, the full log in all its detail is shown. You can then run various in-built XQuery routines to better view and analyse these logs. These XQuery routines have self-explanatory names. See logs more details. -
The
<configuration-name>.jsonfile is a special initialization files that Catch-Phrase executes when an NLI is launched. This sets configuration specific NLI parameters . -
The
config.jsonfile is where you may fix username/password authentication to control which users have access to launched NLIs. One also specifies the default port and proxies of a given NLI as well as the number of simultaneous users (threads) the NLI can support. See flask.json for more details. - The
.dbfiles are binary files are SQLite databases that are used in stand-alone configurations. After building up a.cphrasefile, administrators create these SQLite database (.db file) directly. - The
.db_xmlfiles are XML files representing the entire contents of a database. These are used to migrate databases and evolve databases in highly agile use cases. See this video for an example use of this to migrate a remote Oracle database to a stand-alone SQLite database.
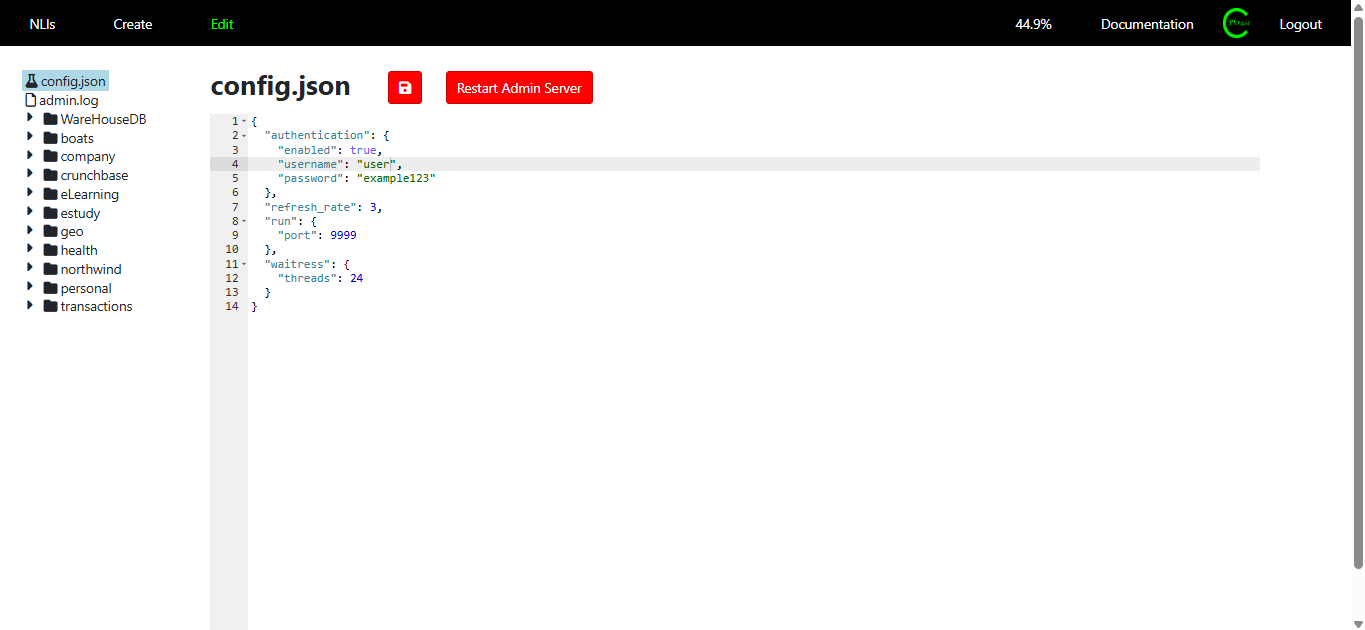
Changing the administrator user name and password
If you wish to change the username/password for Admin Server, navigate to the Edit page and
then click on the config.json at the top left and edit the username and password values. In
the screen below, we have changed the username to "user" and the password to "example-123". Save this
file by clicking on the red save button. After this restart the Admin Server.
Documentation Page
The documentation page always points to the latest version of the documentation hosted at https://c-phrase.com/documentation